Inside The New York Botanical Garden
Gardening Tips
Posted in Gardening Tips on December 21 2009, by Sonia Uyterhoeven
 |
Sonia Uyterhoeven is Gardener for Public Education. |
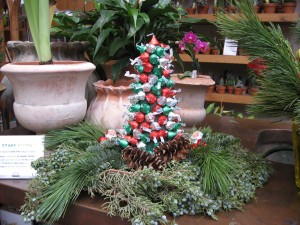 A colleague of mine has a plaque in her office that says “Life without chocolate would be chaos and darkness.” For those of you who adhere to this philosophy, here is an easy holiday activity that is fun for the entire family.
I went to the Floral District in Manhattan on 28th Street and 6th Avenue and purchased an Oasis™ cone. Some of the vendors are strictly wholesale, while others will sell you items and simply charge you the tax if you don’t have an exemption form.
Oasis™, for the uninitiated, is a trademark name for florist foam. It generally comes in green rectangular blocks that you can cut into pieces and saturate for floral centerpiece displays. I wanted the cone, so the vendor went down into his stock room and reappeared with a 12-inch cone, which cost me $4.50. Large craft stores sell similar products. A Styrofoam cone serves the same purpose. I then picked up a box of toothpicks and two bags of Hershey’s Kisses®.
Read More
Posted in Gardening Tips on December 14 2009, by Sonia Uyterhoeven
 |
Sonia Uyterhoeven is Gardener for Public Education. |
I was reading a magazine article recently that suggested placing tomato cages under bird feeders to keep cats away. It reminded me that I am often asked by homeowners how to keep their cats from eating their houseplants. Here are my suggestions.
1. Cats hate the smell of citrus—place an orange peel on top of the soil.
2. Place gravel or pebbles as a mulch around your plants to stop cats from digging in the soil.
3. Spray plant leaves with a homemade blend of water, a few drops of Tabasco sauce, and a sprinkle of cayenne pepper.
Read More
Posted in Gardening Tips on December 7 2009, by Sonia Uyterhoeven
 |
Sonia Uyterhoeven is Gardener for Public Education. |
Every year hybridizers throw something new at us. This is not a bad thing. We all like choices. Some of the newcomers are successes and some are short-lived wonders. They are all worth a try since there is always a good gardening lesson behind every new plant.
While the new introductions are just beginning to be announced in the gardening magazines—they usually start to appear in December issues and gain momentum in January and February—some of next season’s debutants are already being discussed.
A sprightly newcomer is a little snapdragon named ‘Twinny Peach’. It is a double-flowering snapdragon that doesn’t have the “snap” or the jaw-like structure that gives the flower its name. The petals are ruffled into what has sometimes been referred to as a butterfly structure since the petals look like they are fluttering in the wind.
Read More
Posted in Gardening Tips on November 30 2009, by Sonia Uyterhoeven
 |
Sonia Uyterhoeven is Gardener for Public Education. |
Last week I blogged about the causes of late blight. This week we’ll look at ways to deal with it and other fungal diseases in general.
Here at the Garden, we thought we had missed the late blight since we made it through the initial onslaught unscathed. The problem with fungal spores is that some of them love to hang around. In late August we went out into the garden on a Monday after a heavy weekend rain and found a number of plants covered with white powdery spots.
On further inspection we found signs of brown lesions on stems, and several of the leaves were starting to darken into brown spots. Since this fungal problem progresses so rapidly, we decided that we wouldn’t wait to get the problem plants tested. I spent an afternoon filling garbage bags with diseased tomato plants, carefully cutting them up piece by piece so as not to unwittingly spread spores all over the place. Even for compost aficionados, it is advised to toss diseased plants into the trash rather than risk the disease surviving the composting process and infecting new areas of the garden.
After I disposed of the wreckage, I went back into the garden and doused the remaining tomato plants with a product called Plant Health Care Biopak Plus. It is a micronutrient treatment with beneficial bacteria that supports plant vigor (it is similar to spraying the plants with compost tea to protect them).
Read More
Posted in Gardening Tips on November 23 2009, by Sonia Uyterhoeven
 |
Sonia Uyterhoeven is Gardener for Public Education. |
I think it is worth reflecting further on the effects of the cool, rainy weather we had this season—not to reminisce but rather to attain a deeper understanding of the practice of gardening.
Something came along this year that caught people by surprise. Late blight (Phytophthora infestans) swept through the region like a hurricane and caught everyone off guard by acting like an awkward party guest who arrived early.
Meteorologically, its early appearance was logical. Late blight is a devastating fungal problem that thrives with high humidity and cool, rainy weather. It covers a plant with white powdery spores and large green to brown spots that swell to the size of a quarter. The stem is typically marked with brown lesions. This fast-moving disease can decimate a plant within a week.
In the New York area, one of the disease’s greatest targets, tomatoes, are generally planted between Mother’s Day and Memorial Day, when the temperatures are warming up. It is generally only late in the season when they are susceptible to cool, rainy temperatures.
Read More
Posted in Gardening Tips on November 16 2009, by Sonia Uyterhoeven
 |
Sonia Uyterhoeven is Gardener for Public Education. |
In the gardening world we all talk about “cultural care” and nod our heads knowingly: Growing requirements for vegetables include full sun, proper spacing, good drainage, and some kind of soil amendment, preferably organic material. We know the drill.
Being human, however, we often cut corners and hope for the best. Plants tend to be fairly accommodating—they grow in spite of everything we do to them—and often we walk away feeling like a success.
This year, however, the weather was so inhospitable that any corners cut turned into messy gaps in the garden.
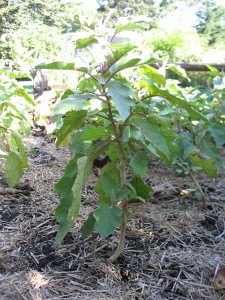 It was a miserable year for the “fruiting” vegetables such as peppers, eggplants, and tomatoes—at least in my garden. The warm-season crops sulked or came to a screeching standstill early in the season when June decided it was April and summer went on an extended leave of absence.
In one part of the garden we planted young transplants of peppers and eggplants in early June as is our common practice. The cool temperatures stunted their growth and these vegetables never entirely recovered (see photo at right). Why? They were planted in an area that is not blessed with full sun. With all the rain, the soil stayed cool and excessively moist for half the season.
Read More
Posted in Gardening Tips on November 9 2009, by Sonia Uyterhoeven
 |
Sonia Uyterhoeven is Gardener for Public Education. Join her each weekend through November 15 for home gardening demonstrations on a variety of topics in the Home Gardening Center. |
 With all of the crazy weather we’ve had this year, there has been a great deal of discussion of how weather and climate affects the plants we grow and cherish. This reminds me of the importance of microclimates in the garden and how it allows us to often successfully push the vegetative envelope.
Recently a woman came to a Home Gardening Demonstration that I was giving on herbs and herbal vinegars. We were looking at a collection of healthy rosemary I was growing in containers, a beautiful, blue upright cultivar called ‘Tuscan Blue’. We then wandered over to another section of the garden where a less robust specimen was struggling in a mixed border.
Rosemary, I explained, is borderline hardy in the New York area. We generally keep it in the ground over winter (it is a perennial herb) and then come back and check on it in the spring to see how it has fared. Usually, it is in such a sorry state that we end up removing it and replanting it with a specimen that has been protected in our greenhouses.
“Oh!” she exclaimed, “I had rosemary that flourished at my home for 5 or 6 years, and it never required any winter protection.” She then proceeded to explain that her rosemary had been situated in an area of her garden that was bordered by a cement walkway, which absorbed heat and warmed the bed. A few feet away, the white walls of the neighbor’s house reflected a fair amount of light into the border.
She had found a perfect microclimate for successfully overwintering her rosemary and other Mediterranean plants. The area provided shelter from damaging winter winds, good drainage, and just enough additional warmth to escort her rosemary through the chilly winter months.
This story reminded me of a friend’s New Jersey garden. The brick house’s laundry room heat vent opened up onto a section of the garden where he planted cannas (pictured), and he never had to lift them in the autumn. They flourished in their niche.
Read More
Posted in Gardening Tips on November 2 2009, by Sonia Uyterhoeven
 |
Sonia Uyterhoeven is Gardener for Public Education. Join her each weekend for home gardening demonstrations on a variety of topics in the Home Gardening Center. |
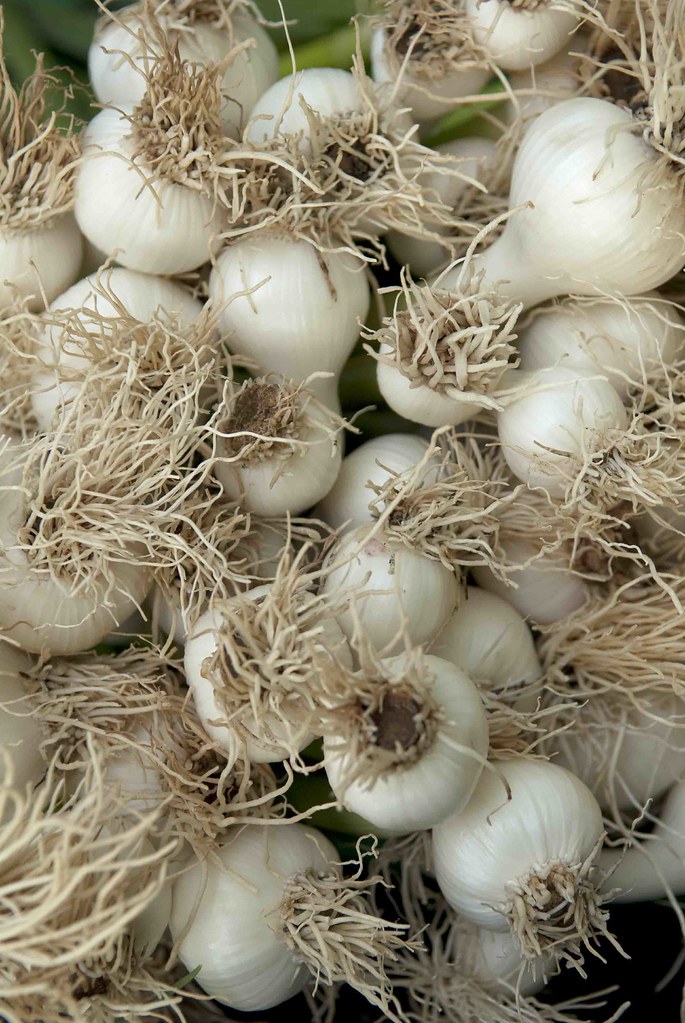 Garlic has been around since the beginning of time. As early as 2500 BC pharaohs were feeding garlic to their laborers to keep them strong and healthy while they built pyramids. The ancient Greeks viewed it as a cure-all. Physicians carried garlic cloves in their pockets during the Great Plague to ward off disease. The British used garlic juice in preparing makeshift bandages during WWI.
Beyond medicinal uses, garlic has a colorful history. In Medieval times people carried garlic in their pockets as protection from witches and vampires. Braided garlic was hung above cradles to prevent fairies from stealing sleeping infants. In the Middle East it was an aphrodisiac that grooms would stick on their lapel to bless their wedding night.
While much of a garden is planned and planted in the spring, garlic is best planted as a fall crop, treated like any other hardy bulb. Planting in the fall enables the plant to develop a good root system but no top growth so that in the spring, once the temperatures warm up, it is ready to go.
Garlic likes full sun and good drainage, and generally benefits from the addition of compost, cow manure, or leaf mold. Heavy soil should be turned: Loose soil is important for good bulb formation.
In the New York area garlic is generally planted in October and November. Take a nice fat bulb and split it apart into individual cloves. Use the larger cloves in the garden and leave the smaller ones for your skillet. (As with other bulbs, a larger bulb has more food storage capacity, so you get a larger, healthier plant.) Plant the cloves 1–2 inches deep and 4–6 inches apart.
Read More
Posted in Gardening Tips on October 26 2009, by Sonia Uyterhoeven
 |
Sonia Uyterhoeven is Gardener for Public Education. Join her each weekend for home gardening demonstrations on a variety of topics in the Home Gardening Center. |
With all the rain this past summer, some of my herbs thrived while others collapsed from exhaustion in mid- to late-summer. My garlic chives, sometimes named Chinese garlic (Allium tuberosum), were glorious in the Sensory Garden. The white umbel-shaped flowers floated above the cluster of grass-like foliage from mid-August into September. They were one of the showier features in the garden. All the rain served them well.
The leaves of garlic chives are similar to the better-known chives (Allium schoenoprasum, pictured), only flat and slightly wider, and can be used in the same way—cut them into small pieces with your kitchen scissors and add them to any dish for a garlicky kick.
If you are a garlic lover, this attractive herb is a must. I took one of my weekend demonstration groups into the Sensory Garden, where we harvested some of the garlic chives. As I cut the leaves into small pieces, the odor wafted in the air. While I often pass herbs around for visitors to smell, this one could be appreciated by everyone in the group simultaneously.
I experimented with a few herbal vinegars this year. One was a spicy concoction of cider vinegar, hot peppers, spicy oregano and garlic chives. I included a few of the flowers from the garlic chives for flavor and ornamental value; it was an attractive arrangement.
Four weeks later when I opened the bottle, the aroma of the garlic attacked my nostrils. For garlic lovers the vinegar was a success. For my own personal taste, I loved the kick of the hot peppers and oregano, but will tone down the garlic for next year. I think I will simply add the flowers and omit the foliage and try for a milder taste.
Read More
Posted in Gardening Tips on October 19 2009, by Sonia Uyterhoeven
 |
Sonia Uyterhoeven is Gardener for Public Education. Join her each weekend for home gardening demonstrations on a variety of topics in the Home Gardening Center. |
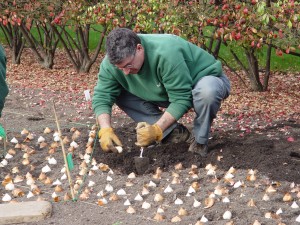 Over the past year the horticulture department staff has had some wonderful master classes on planting bulbs through the visits of Seasonal Walk co-designer Jacqueline van der Kloet and a slew of other Dutch visitors. They arrived with their heart-shaped trowels (plantschopje) that were indicative not only of their practicality in planting but their love for anything bulbous.
The heart-shaped trowel has a very sharp point that is ideal for stabbing the soil and pulling it back to drop in a bulb. Bulb growers these days have diversified from the traditional trowel taking advantage of an array of shapes and sizes. Some are slim and narrow for those bulbs that need to go deep into the bowels of the earth, while others are wide with sharp tapered points that act like mini-spades. See Brent and Becky’s Bulbs and our Shop in the Garden for some good selections.
Regardless of what is in your hand, it is important to remember when planting a bulb to hold the trowel as you would a dagger, with the front facing your body. Stab the soil, pull the trowel toward you, and simply drop the bulb in. It’s actually not so simple when the bulbs number in the hundreds or thousands. But this method will help you get a good rhythm going to carry you through.
I generally stand when planting, hinge at my hips, slightly bend my knees, and get to work. If you prefer crouching or kneeling, be aware of the ground you are working on. At the Garden, we stand on planting boards while we work so as not to compact the soil; the boards even out the pressure. The ideal, of course, is to keep your feet out of the border by leaning over from the perimeter, but this is not always possible.
Read More

 A colleague of mine has a plaque in her office that says “Life without chocolate would be chaos and darkness.” For those of you who adhere to this philosophy, here is an easy holiday activity that is fun for the entire family.